Pro plan required. Version history is available on the Pro plan.
How It Works
The version tracking system runs silently in the background every time you interact with the AI.AI makes a change
Whenever the AI writes, modifies, or deletes files in your project, a new version is created behind the scenes. This includes creating new Swift files, editing existing views, updating assets, or removing unused code.
Version is timestamped
Each version is tagged with the exact time it was created, so you can see a clear timeline of your project’s evolution from first build to latest change.
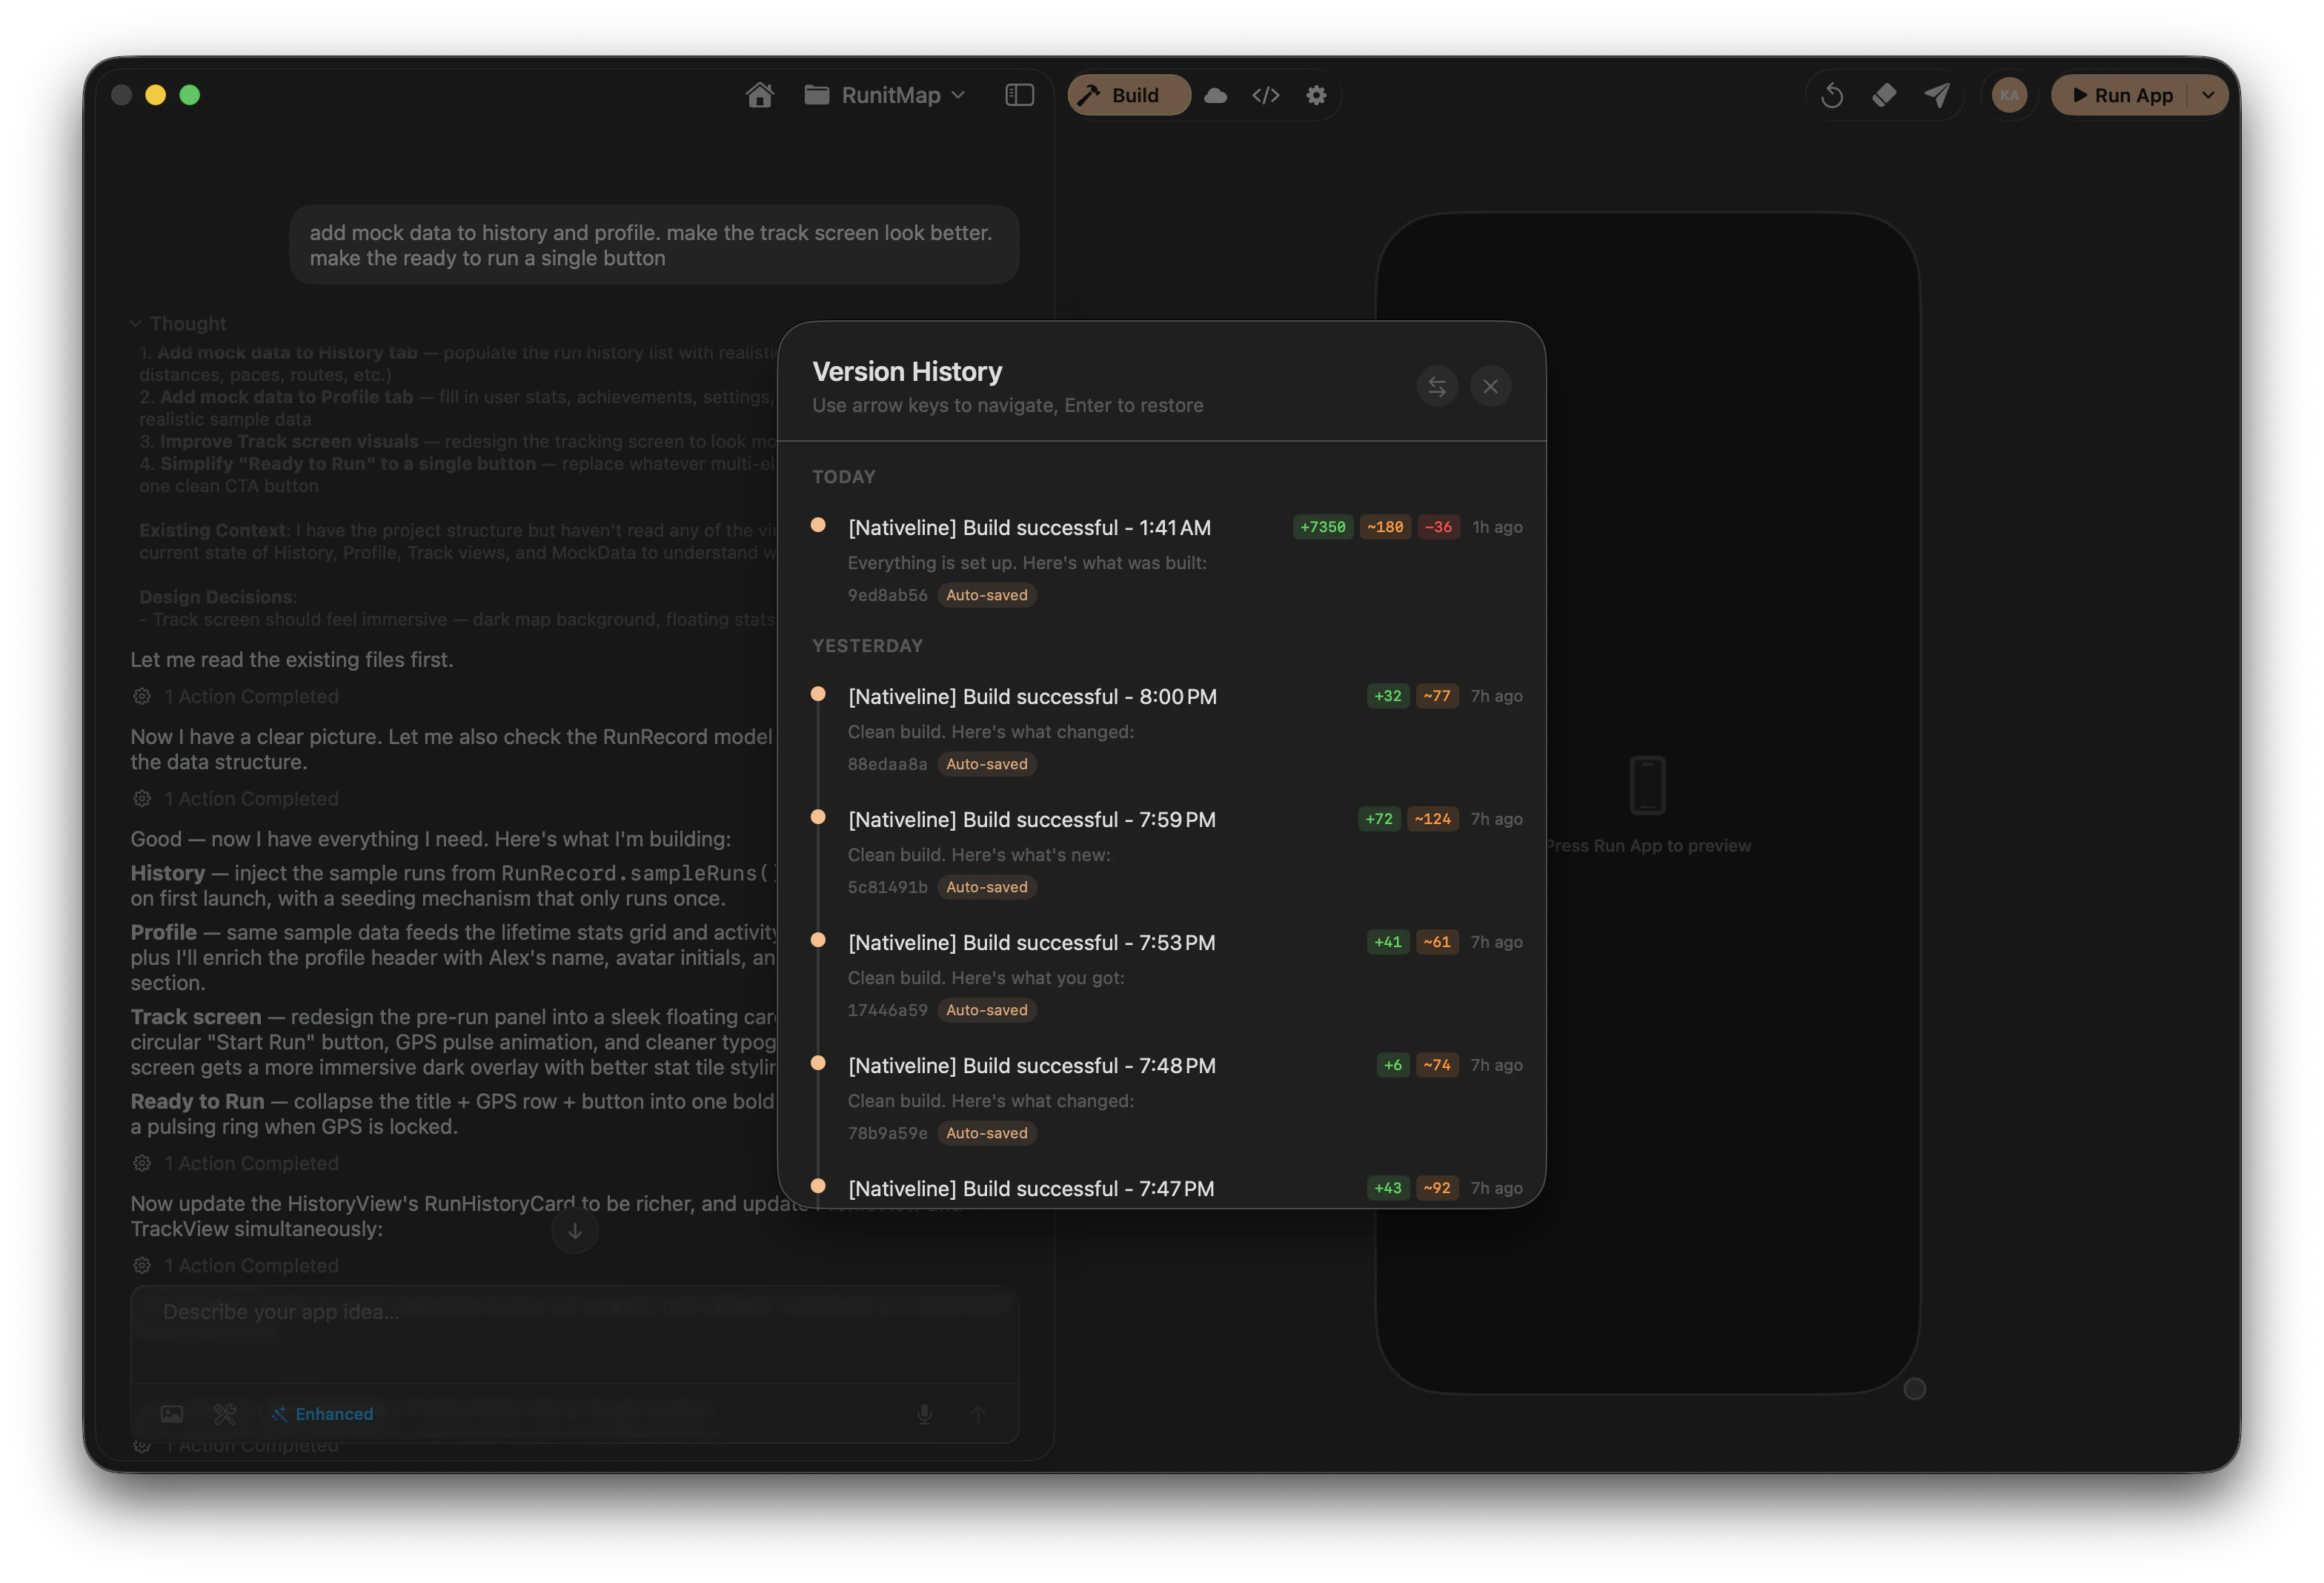
| Group | What it shows |
|---|---|
| Today | All changes made during your current session |
| Yesterday | Yesterday’s changes |
| By day name | Monday, Tuesday, etc. for the current week |
| By date | Older changes shown with their full date |
Viewing Version History
Select Version History
Open the Version History section to see your project’s full timeline of changes.
Restoring a Previous Version
Found a point in time you want to go back to? Restoring is straightforward.Select a version
Click on any version in the timeline to select it. You’ll see a summary of what the project looked like at that point.
Review the changes
See what will change if you restore to this point — which files will be reverted, which will be added back, and which will be removed. This gives you full visibility before you commit to anything.
How It Helps
Version history is your safety net. Here are the most common ways it saves your work:Undo a bad AI change
Undo a bad AI change
The AI made an edit that broke something or looked wrong? Jump back to the version right before that change. This is the most common use case — you asked for something, didn’t like the result, and want to go back.
Recover from a series of failed builds
Recover from a series of failed builds
Sometimes a sequence of changes leads you down a dead end. Maybe you asked the AI to refactor a view, then fix the refactor, then fix the fix. Instead of trying to untangle the mess, just restore to the last working state and try a different approach.
Compare before and after
Compare before and after
Want to see how a feature looked before the AI redesigned it? Browse the timeline to find the earlier version. This helps you decide whether the new direction is better or whether you should go back.
Recover deleted code
Recover deleted code
Accidentally asked the AI to remove something you needed? Every previous version of every file is preserved in the history. Nothing is truly gone as long as you have version history.
Experiment freely
Experiment freely
Version history removes the fear of breaking things. Try bold changes, experiment with new approaches, and know you can always get back to a working state. This freedom to experiment is one of the biggest benefits.
Things to Keep in Mind
Here are some important details about how version history works:- Versions are per-project. Each project has its own independent version history. Restoring one project doesn’t affect any other.
- Only AI changes create versions. Manual edits you make in the code editor don’t automatically trigger a new version. If you want to preserve a manual edit, make another AI change afterward.
- Restoring doesn’t delete future versions. After restoring to an earlier point, you can still see and navigate to versions that came after the one you restored to. Nothing is lost.
- No storage limits. Your version history isn’t capped. Every change is preserved for the lifetime of your project.
Version history is automatic — you don’t need to manually save or commit. Every AI action creates a checkpoint.
Typical Workflow
Here’s how most people use version history in practice:Frequently Asked Questions
Can I restore to a version from days ago?
Can I restore to a version from days ago?
Yes. Version history preserves every change for the lifetime of your project. You can go back to the very first version if you need to.
Does restoring affect my conversation history?
Does restoring affect my conversation history?
No. Restoring a version only affects your project files. Your conversation with the AI remains unchanged.
What if I restore and then want to undo the restore?
What if I restore and then want to undo the restore?
You can. Since restoring doesn’t delete future versions, you can navigate forward in the timeline and restore to a later version — including the one you just came from.
Code Editor
View and edit the code the AI generates.
AI Memory
How the AI remembers your preferences and decisions.