The Wizard Steps
App Feel
Choose the vibe for your app. This guides the AI’s design decisions — spacing, typography weight, corner radii, and overall aesthetic.Pick one:
- Simple & clean — Minimal UI, lots of whitespace, understated controls
- Modern & polished — Refined with subtle shadows, smooth transitions, and careful spacing
- Bold & expressive — Strong colors, large type, high contrast, attention-grabbing layouts
- Dark & minimal — Dark backgrounds, muted accents, sleek and focused
- Something else — Type a custom description of what you want
Color Palette
Pick the colors that define your app. You have three options: choose a preset, generate a palette, or build one from scratch.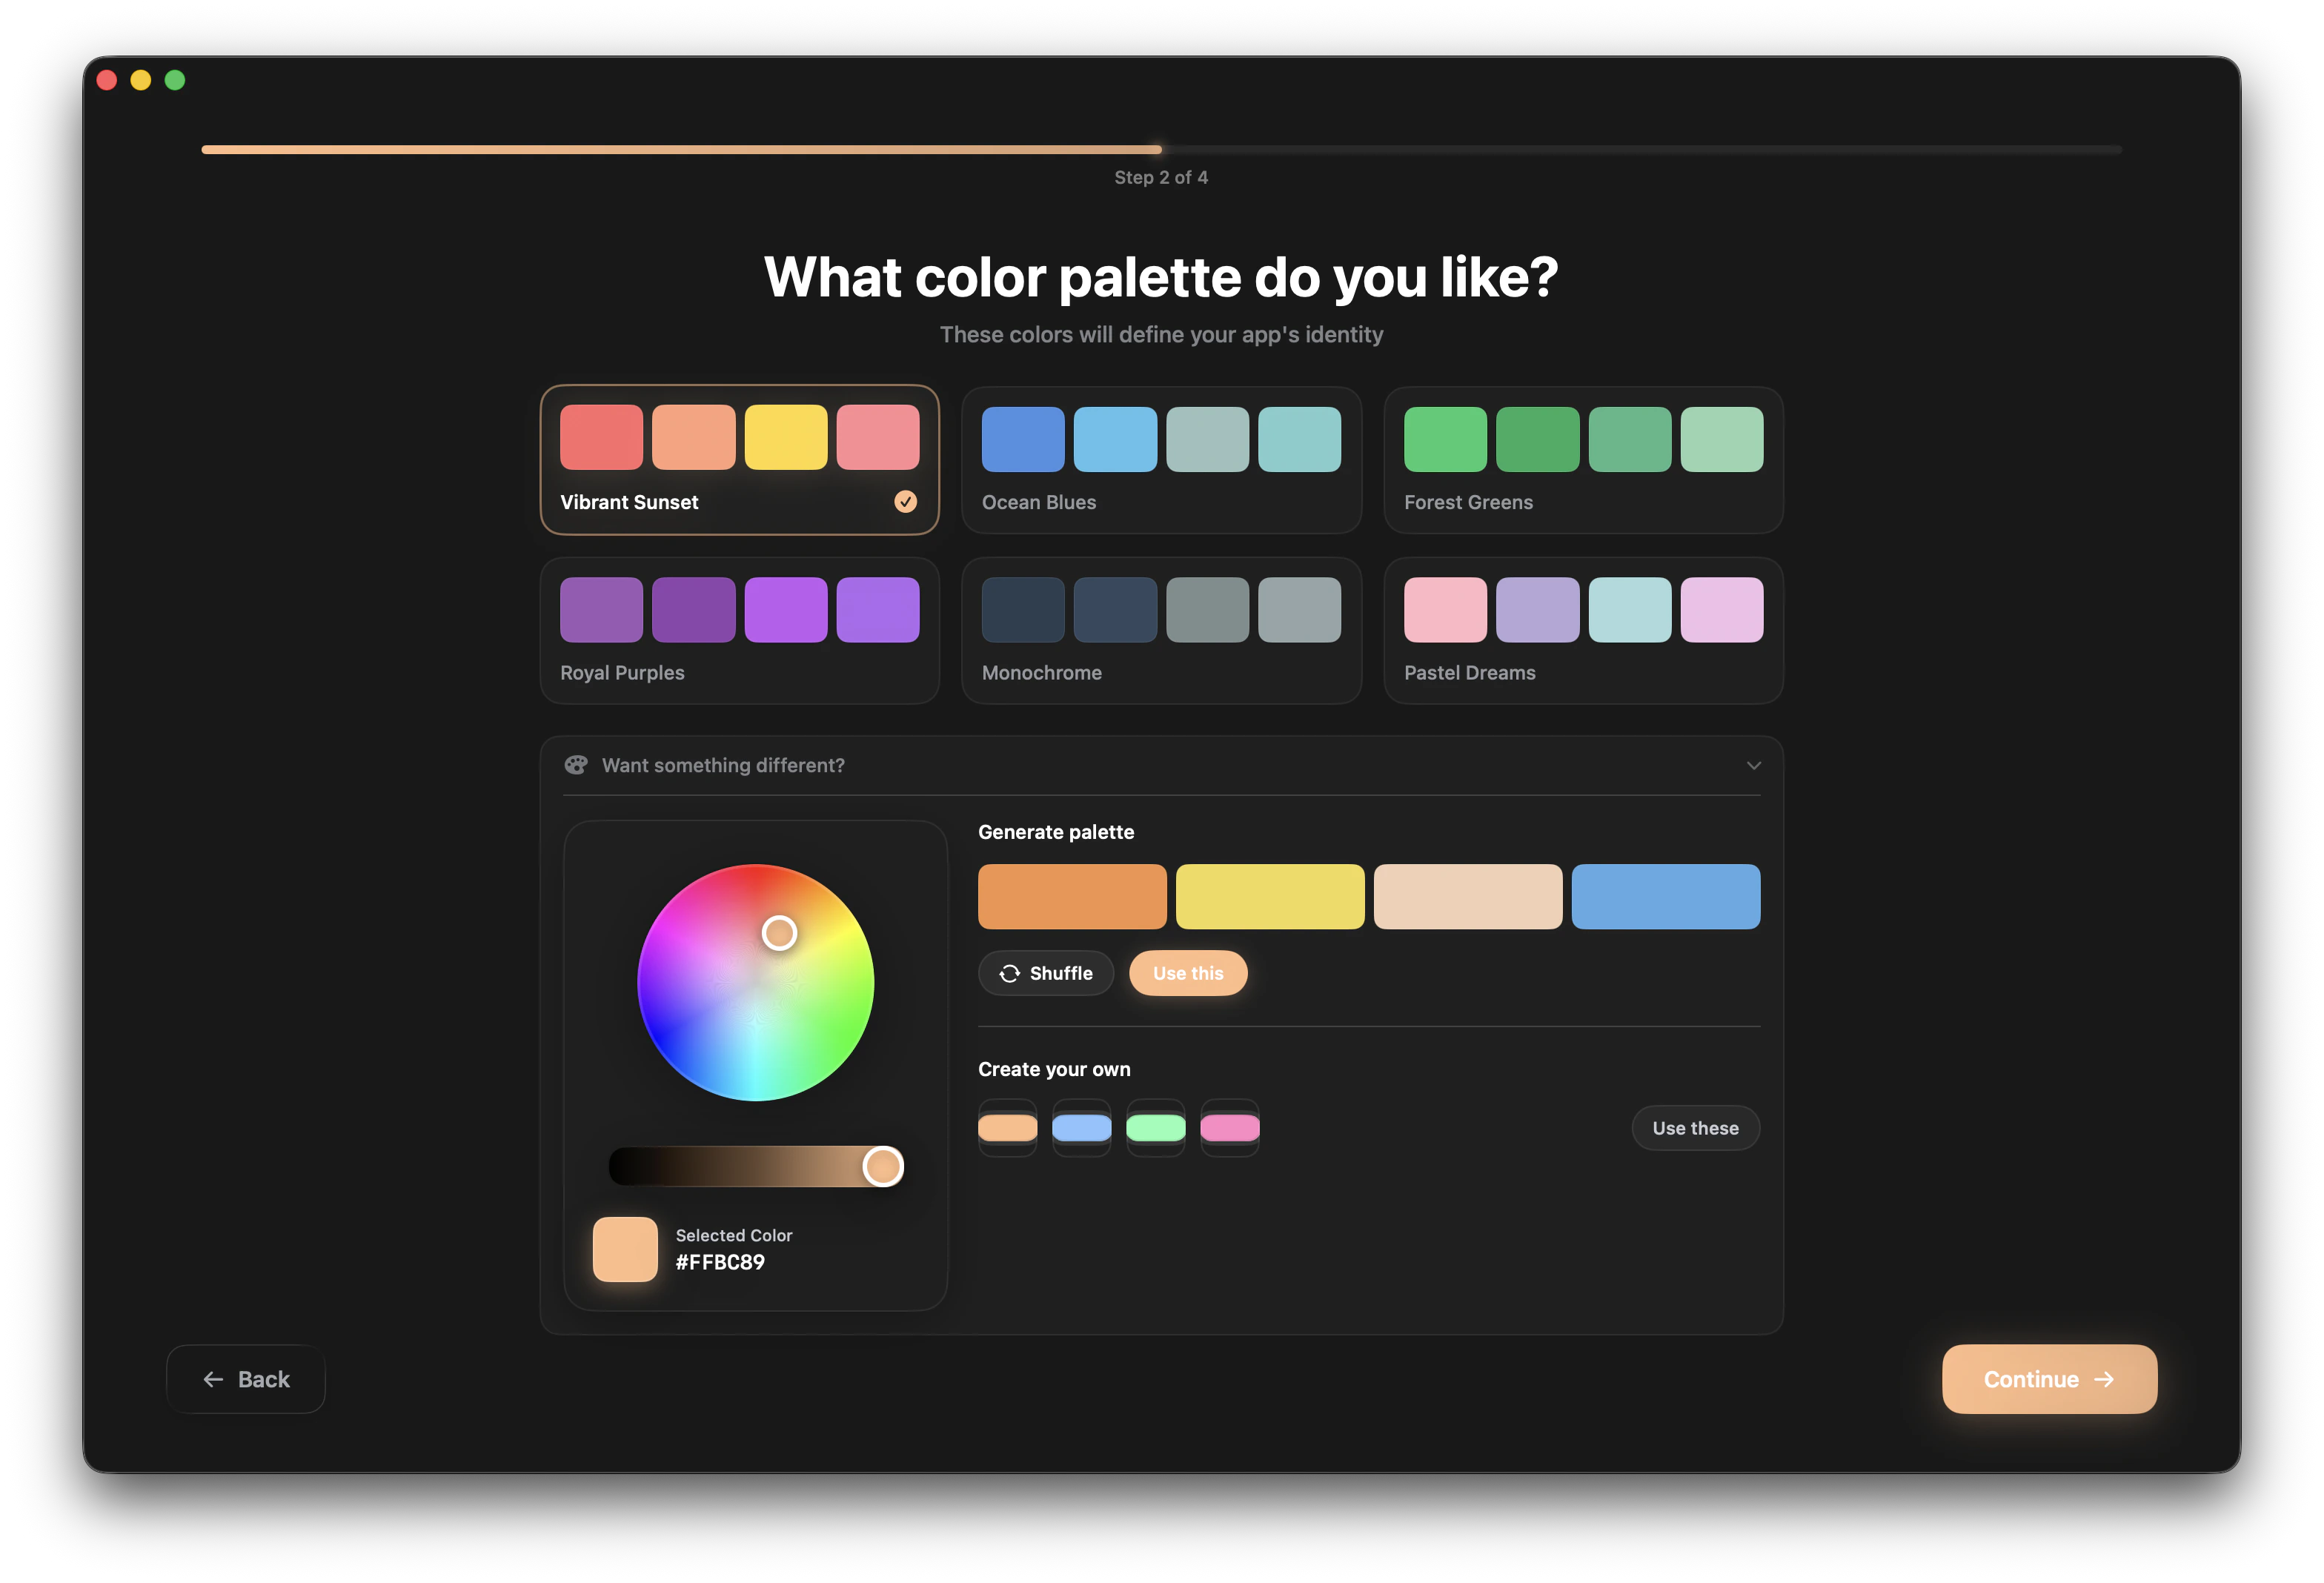
Summary
Review everything at a glance before moving forward. You’ll see your selected app feel, color palette, and platform all on one screen. If anything looks off, go back and adjust.This is your last chance to change things before the AI starts building, so take a moment to confirm your choices.
App Name
Name your app. The name is validated as you type:
- No special characters allowed
- No spaces allowed
- No leading numbers
- Must be at least one character
FitTrack, RecipeBox, ClipStash, Zenith, TasklyExamples of invalid names: My App (spaces), 123Go (leading number), Cool!App (special character)Color Palette Deep Dive
The color step gives you three ways to pick your palette. Use whichever approach matches how you think about color.Preset Palettes
Six palettes are displayed as color swatch cards in a grid. Click one to select it — you’ll see the colors update immediately in the preview.| Palette | Colors | Best for |
|---|---|---|
| Vibrant Sunset | Warm oranges, reds, and golden tones | Energetic, warm apps |
| Ocean Blues | Cool blues ranging from deep navy to light sky | Professional, calm apps |
| Forest Greens | Natural greens with earthy undertones | Health, nature, wellness apps |
| Royal Purples | Rich purples with violet and lavender accents | Creative, premium apps |
| Monochrome | Clean grays, blacks, and whites | Minimal, content-focused apps |
| Pastel Dreams | Soft, muted pastels across the spectrum | Friendly, approachable apps |
Generate a Palette
Want something more specific? Expand the “Want something different?” section to reveal the palette generator.Pick a base color
Use the color wheel to select a base color that represents your app’s identity. Drag around the wheel to find the right hue, then adjust brightness and saturation.
Shuffle for variations
Click Shuffle to generate harmonious palettes based on your base color. The generator creates complementary, analogous, and triadic color schemes automatically. Each shuffle produces a completely new set.
Custom Palette
If you have exact colors in mind — maybe from a brand guide, a design file, or a specific hex code you love — the custom option lets you pick 4 individual colors using native macOS color pickers. Each picker lets you:- Choose from the color wheel
- Enter a specific hex code
- Use the eyedropper to pick a color from anywhere on your screen
The platform was already chosen on the home page, so it doesn’t appear in the wizard.
How Your Choices Affect the Build
Everything you select in the wizard is passed to the AI as structured context. Here’s how each choice influences the result:| Wizard step | What it affects |
|---|---|
| App Feel | Spacing, typography, corner radii, animation style, overall density |
| Color Palette | Primary color, accent color, background tones, text contrast |
| App Name | Project folder name, display name, bundle identifier |
Frequently Asked Questions
Can I change my choices after the wizard?
Can I change my choices after the wizard?
You can always ask the AI to adjust colors, style, or other design choices through the chat interface after your project is created. The wizard sets the starting point, but nothing is locked in permanently.
What if I skip everything?
What if I skip everything?
If you skip the feel and color steps, the AI uses sensible defaults: “Modern & polished” feel with the Vibrant Sunset palette. You still need to provide an app name — that step can’t be skipped.
Can I go back to a previous step?
Can I go back to a previous step?
Yes. Use the back button to return to any previous wizard step and change your selection. Your choices are preserved as you navigate between steps.
Does the app feel affect functionality?
Does the app feel affect functionality?
No. The app feel only affects visual design — spacing, typography, colors, and aesthetics. It doesn’t change what features the AI builds or how your app works.
After the Wizard
Once you confirm your app name, Nativeline creates your project and opens the chat interface. The AI begins building your app immediately using the description you provided on the home page, styled with the feel and colors you chose in the wizard. You’ll see the AI working in real-time — writing Swift code, creating views, and assembling your app. Within moments, you’ll have a working preview to interact with.Home Page
Where every project starts — describe your app and pick a platform.
Chat Interface
Start building and iterating on your app through conversation.